Prusa i3 MK3S 3D Printer Kit (Part-4)

This is the final entry in the 4-Part blog posts re. my Prusa i3 MK3S printer. The previous posts can be found here: Part-1, Part-2, Part-3.

Once I completed assembly of my printer, I followed the instructions to do a self-test and calibration. The self-test failed while performing the “Loose belt pulley test” on the X-axis. The manual said to be sure the motor pulleys are not loose, and to be sure the screws are tightened against the flat part of the pulley shaft.

First, I checked all the pulleys and they were not loose. This was puzzling to me, because I could not get rid of the error. I finally decided to re-tighten the X-Y belts. This fixed the problem. I was quite surprised how tight the belts had to be in order to pass the self-test. If you run in to this same situation, check your belt tension.

The next challenge I had was getting the print head depth calibrated correctly. I followed the instructions using the ‘sheet of paper’ method, but the hard part for me was getting the “first layer” calibration correct. This involves getting the perfect Z-axis height at the beginning of the print. The instructions really did not provide a lot of help – they simply describe, in general, what the thickness of the print layer should be.

Continue reading

Prusa i3 MK3S 3D Printer Kit (Part-3)

In Part-1 of the Prusa i3 MKS3S 3D printer kit build, I gave a brief overview of my build experience. In Part-2, I provided more details of putting the printer together. Here in Part-3, I finish up describing the challenges I had during the assembly process.

NOTE: Remember, the below steps are just highlights of my assembly experience. They do not match the assembly steps in the manual.

Step-7 – Installing the X and Y belts. As the build continued, the number of parts to physically work around as you assemble components increases. I found the section on belt installation challenging. The toothed belts are provided flat – not a continuous loop. You have to bend a belt end tightly around a bolt on the belt tensioners, and run them around pulleys.

Impression-7 This part of the assembly took way longer than it should. It was very difficult to determine how to set the correct tension. This caused me great pain later in the assembly. I would say the belts mechanisms are one of the most important parts of a 3D printer.

Step-8Assembling the PSU. You may recall in Step-5, I assembled the PSU mounting bolts on the wrong side of the rail. Now that the printer was 75% assembled, it came to haunt me. When I went to mount the PSU, the screws were on the wrong side.

Impression-8 The manual was very predictive. “Incorrect placement of the PSU holders will lead to issues later,” is the ground truth. I had to disassemble a lot of parts to correct this issue.

Continue reading

Prusa i3 MK3S 3D Printer Kit (Part-2)

In Part-1 of the Prusa i3 MKS3S 3D printer kit build, I gave a brief overview of my build experience. In Part-2, I provide more details of putting the printer together.

First – some free advise. Take your time building this kit. It is a big assembly project. Trust me on this. In my case it took a full weekend to get it to work.

NOTE: Remember, the below steps are just highlights of my assembly experience. They do not match the assembly steps in the manual.

Step-1Pull the “Assembly Instructions” manual out of the big parts box, and then put the box away. Spend an hour or more going through the assembly manual. READ IT. Mark it up with notes. Get familiar with every step of assembly. All of it. Consume this manual if you want to be successful in your build.

Impression-1 The documentation is excellent. As good as it is, I was tripped up in a couple of places that really sent me down some rabbit-holes. Details follow.

Step-2Inventory the parts in the boxes. There are a lot of parts in this kit. Again, the packaging of the parts is terrific. All in their own box, all well marked. This will save you a lot of time.

Impression-2 The kit comes with a box of “extra” parts. Whoah! Does it ever. The box of extra parts is enormous. At one point I was beginning to believe I could build a second printer with the number of extra parts. I understand why they do this. Sending a missing or broken part to the US takes time and money.

Continue reading

Prusa i3 MK3S 3D Printer Kit (Part-1)

I finally got around to assembling my Prusa i3 MK3S 3D printer kit. And it was quite an adventure. In the next couple of blog entries, I will walk through the experience.

The short version?

  1. I made the right choice buying this printer.
  2. The design, quality, and documentation are first-rate.
  3. The kit is not for beginners.
  4. It takes a long time to put it together.
  5. It did not work out of the box.
  6. 3D printing is a whole new world if you are a maker.
  7. 3D printing requires endless patience because it take time to make things.

Continue reading

DOTKLOK Revival

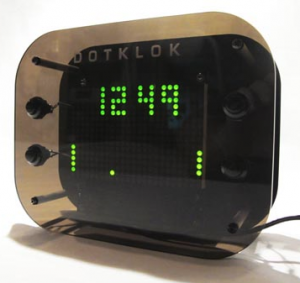
Way back in 2013 a very creative and talented Maker named Andrew O’Malley created the DOTKLOK project. The project has been dormant for a very long time.

Ol’ Sopwith is a long time clock builder and I became fascinated with this project. Why? Several reasons: a really cool set of clock animations including ‘pong’, ‘space-invaders’, and ‘pac-man’, a custom Arduino design that is easy to build from through-hole parts, and excellent documentation.

In 2014, I purchased enough parts to build three DOTKLOKS. The only thing I did not have was the acrylic front and back panels. At that time, Andrew was selling the clock in kit form or assembled. The problem for me, was the cost was beyond what I was willing to pay.

Without the panels, I packed up the parts and stored them in the parts closet with the intention of building an enclosure out of wood when I found the time. Never happened.

Recently, I discovered there are plenty of on-line ‘self-serve’ laser cutting services that can cut the acrylic panels for a DOTKLOK. Although a set costs about $20 USD (ouch), I took the plunge and ordered a set of panels using the provided Inkscape SVG from the project.

Once the panels arrived, I created a ‘prototype’ DOTKLOK. When I loaded up the Arduino code version 1.5 into the Arduino development GUI, I quickly discovered the code failed compilation with dozens of errors. It seems the Arduino API has changed considerably over the last five years. No surprise.

After a fair amount of research and effort, I was able to upgrade the code and get a clean compile. I uploaded it to the DOTKLOK prototype and it fired right up. Oh the joy. There are still some problems with the code in some of the animations, but I will fix those soon.

As I always do, I decided to hack the original DOTKLOK design to make it better. The aluminum standoffs are ugly and Andrew used two of them stacked together to get the right length. I also want to use shorter standoffs to make the clock “thinner.”

I ordered black aluminum standoffs (metric) and matching screws from AliExpress (China). They should arrive in a couple of weeks. I also discovered the Sure LED arrays used in the project are still available from a few sources, but only available in red.

I will publish all of my work on the DOTKLOK revival project soon. If you are interested in purchasing a kit or assembled DOTKLOK, let me know. I will consider making them available.

Thanks again to Andrew O’Malley for creating such a cool project.

Sopwith


About to Enter the 3D Printer World

I know you smoke breathers may find this hard to believe, but Ol’ Sopwith is finally going to enter the universe of 3D printing. I have dragged my feet on this technology for a couple of reasons.

  • I did not want to spend the money. $300 USD 3D printers are cheap and temperamental, and $2500 USD printers are way above what I am willing to pay.
  • I was afraid it would not be useful. (I do not want to waste time printing toy objects.)
  • I did not have the time to invest in learning a whole new technology from the ground up.
  • I did not have space for it.
  • I did now want a noisy, smelly device in my office or workshop.

Time have changed. I have a couple of projects I am working on that could really use the capabilities of a 3D printer. Plus the cost of really good printers has come down and the capabilities have gone up dramatically.

After extensive research, I decided the best printer on the market for price/performance is the Prusa i3 MKS3. The are built in Czechoslovakia by a company founded by Josef Prusa, one of the innovators in the 3D early days.

I ordered the kit version and am expecting it will take about 4 hours to assemble. It should arrive in a couple of days. I will post blog entries about my assembling, testing, and printing experiences so you can follow along.

Stay tuned.

Sopwith

Zabbix Agent User-Parameters

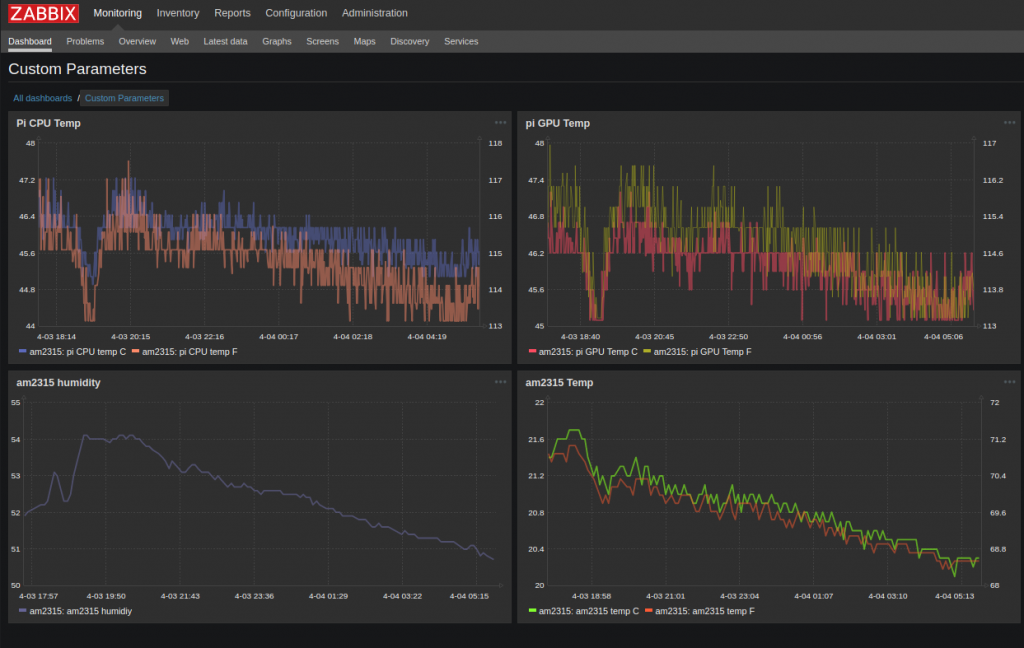
This is part three of the ‘How-To‘ series on leveraging the Zabbix IT monitoring platform using a Raspberry Pi. Part-1 showed how to install the Zabbix server on a Pi. Part-2 showed how to get the Zabbix agent running on a Pi. In this post, I show how to graph the CPU and GPU temperature of a Pi and the temperature/humidity readings from a precision AM2315 temperature sensor.

The Zabbix platform is incredibly flexible. It allows nearly endless possibilities of tracking and graphing data using custom User-Parameters. This is very useful to Makers since it allows the monitoring of sensor data on custom dashboards.

You can download the ‘How-To’ document here. I have also provided a zip file containing the custom scripts and agent configuration user parameter section on the downloads page.

Let me know how you use the Zabbix platform with your Pi fleet to monitor and track sensor data.

Zabbix Agent on a Raspberry Pi

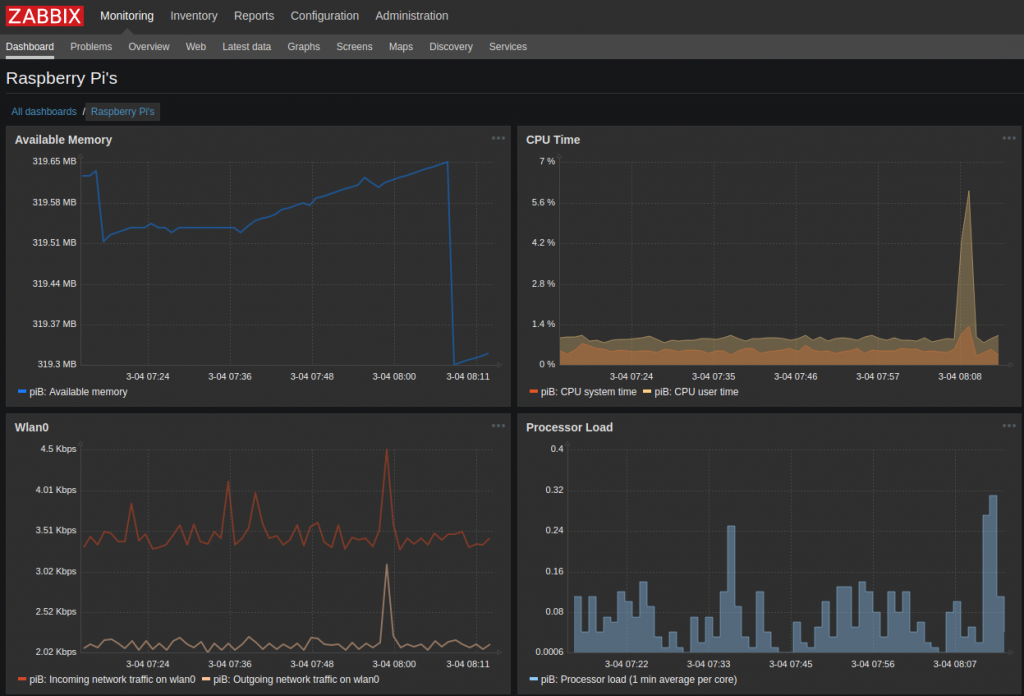
In my last post I showed how to install the Zabbix IT monitoring platform on a Raspberry Pi. This highly capable and flexible open-source platform provides the ability to track the status and performance of your Pi fleet.

In this post, I provide the second part of a Zabbix implementation on a Pi: How-to install and configure the Zabbix agent and create dashboards on the server.

You can download the detailed ‘How-To’ document in PDF format here.

Zabbix Server on a Raspberry Pi

I received an interesting Email last week from someone who wanted to know if I knew how to monitor an AM2315 temperature sensor attached to a Raspberry Pi using a Zabbix server.

My response? Ummm… What is Zabbix? After some brief research, I was introduced to another stellar open-source project with terrific documentation.

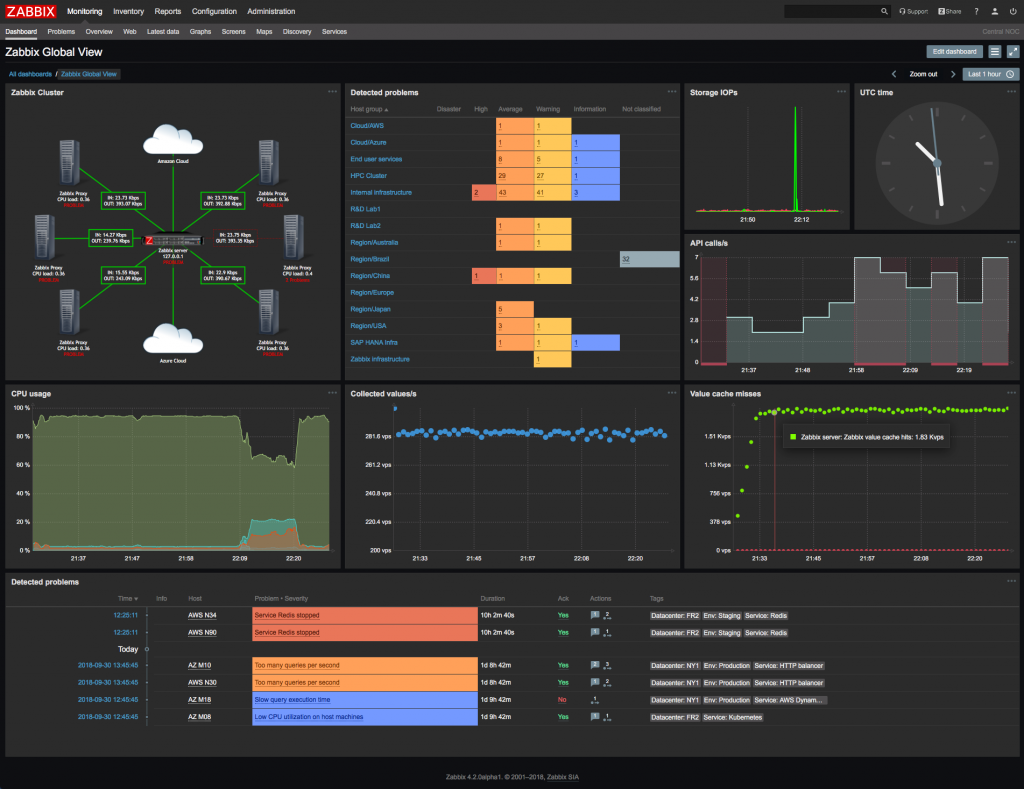
Zabbix is a platform used by IT professionals all over the world to monitor their infrastructure. The platform consists of a server component and a deployable agent that runs on nearly anything. The agent is used to report back to the server performance metrics such as memory, disk, CPU utilization, and a boatload of other metrics. All in a beautiful and configurable dashboard.

The Zabbix system is very flexible and allows the creation of custom agent commands that allow you to configure and monitor any platform.

I was so intrigued by this newly discovered gem, I downloaded and installed it on a Raspberry Pi3. I have written a ‘How-To’ document that walks through the process.

In upcoming posts I will show how cool this platform really is. In fact, I will even show how to report temperature sensor and other data to a Zabbix server.

Pi Real-Time Clock ‘How-To’

For Makers that need an accurate clock for their projects, the Raspberry Pi does not have one. In order to save costs and board space, a hardware clock is missing in all versions of the Pi. Fear not. There are many options available if you need an on-board clock for a project.

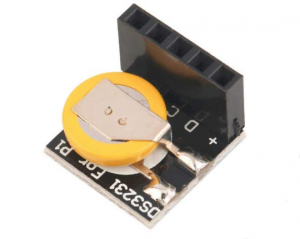
DS3221 RTC

I have written a ‘How-To‘ document that walks through the details of getting a real-time clock (RTC) up and running on a Raspberry PI. I know there are plenty of resources on the Web that show how to do this, but I like to take the extra time to write a complete document, not just a list of bullet points.

Makers that are new to the Raspberry Pi and its SBC brethren appreciate having the screen-shots that make it easier to follow along. As long as my ‘How-To’s’ help beginner or intermediate Makers create cool things, I will continue to write documentation.

You can download the ‘How-To here.